HOW TO PHOTOGRAPHIC FIRE, OR FLAME, AS AN OBJECT, ACCENT AND SOURCE OF LIGHT
 Fire is an interesting thing. We have a very deep and instinctive relationship with him, so it is not surprising that adding a flame to a photo can have quite a strong influence on the viewer. This article presents a few examples, and also explains how the pictures were taken, and, in addition, set the vector to create your own photos with fire.
Follow the wise words of the Frankenstein monster: “Fire is bad! ..” Heat and smoke can damage your equipment, a flame can quickly get out of control and burn some things, and most importantly, a fire can kill you. Observe the basic safety tips for such a survey, which you should already know (and be sure to follow them!):
think ahead and plan a shoot from start to finish;
make a fire extinguishing plan just in case;
do not work near objects that you would not want to damage in a fire;
work in a well-ventilated area;
make sure you work in a place where in the worst case the worst is not so bad.
You will find that fire is used in photographing in different ways. It can play the role of the main object, the underlining element (accent) or the main light source. As a rule, you get a combination of these three options, but it is better to disassemble them separately for a start.
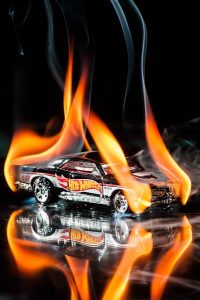
Fire as an object
The pictures below focus on the flame (or its effect) and the details that can be reflected in it.
In most cases, you will want to use a shutter speed that is fast enough to stop the movement to see the details in the flame. As always, “fast enough” close to what you are shooting, but a good starting point would be a shutter speed of about 1/250 or faster. As it increases, you will have to use a wider aperture and higher ISO values.
Sometimes, it will be interesting to show that the fire radiates – for example, sparkling tracks or fiery flashes. Slow shutter speeds are the key to shooting in this case.
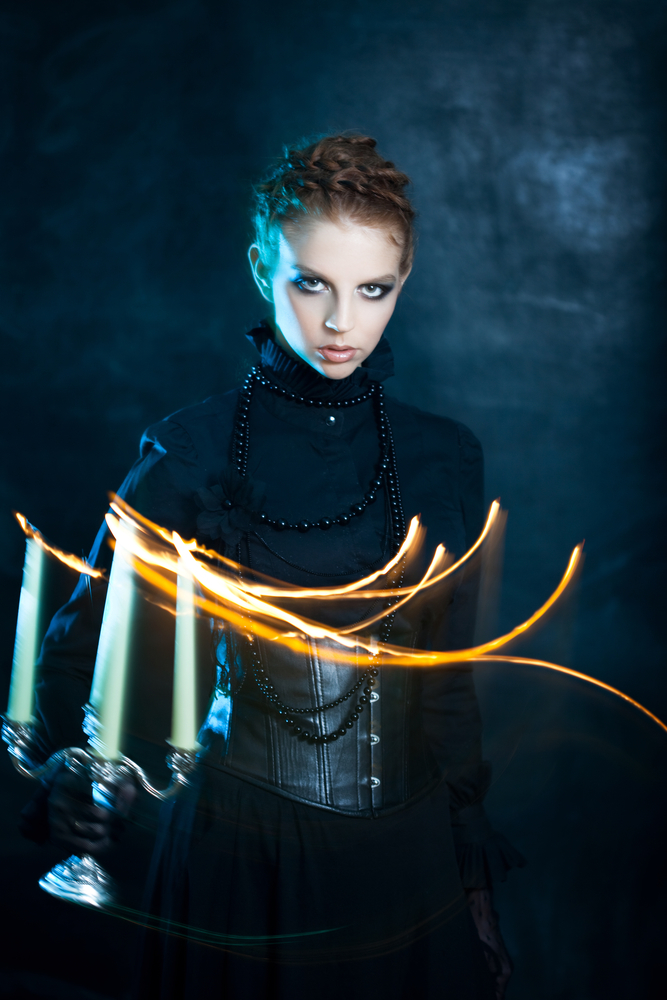
Fire like accent
In this type of picture, the flame is one of the many elements of the big picture. The difficulty in this case is that it is necessary to use additional lighting to show the fire, while not forgetting to take pictures of the surroundings. The key here is to expose the flame and then add light to the rest of the picture. If you cannot control the lighting, you need to look for perspectives in which you can place a flame in the background of the frame to highlight it. A darker, more solid background is preferable, but in principle, everything that will contrast should work.
Fire as the main source of light
Fire can be a great source of light with its soft shadows and warm color. Longer shutter speeds, wider apertures and higher ISO values are often the right choice for shooting by the campfire. You can use a slower or slower shutter speed as you get closer to the fire, when more light strikes the object, and besides, it is in principle more powerful.
When working with a shallow depth of field that is accompanied by a well-open diaphragm, try focusing on objects that have contrasting edges (for example, silhouettes of stationary objects), and not what you can consider the main object. This can give you a generally clearer image, since the shifting light of the fire will blur the edges and soften the shadows of the objects that it illuminates.
Look closely at the flames and you will see several colors, gradients and intensities, so it goes without saying that the color of the fire is a complex issue. It depends on the temperature, type of fuel, the amount of oxygen and the degree of its mixing with the fuel, as well as on many other factors. With that said, when it comes to photographing fire, a few simple ideas should help you control its color.
In a photo of the flame, the fuel that burns will affect its color the most. Wood, paper, clothing, or anything else that ejects a lot of unburned particles (smoke) are likely to burn yellowish orange. Butane lighters, propane torches, liquids with a high alcohol content or other fuels.