HOW TO CREATE A FUNNY VARIOUS COLOR IMAGES WITH THE HELP OF A POLARIZATION FILTER
 The keystone in modern manufacturing is plastic. And this is a really amazing thing. Look around – you will see a variety of plastic materials used in an endless variety of products. From small pens to airplanes – yes, even modern commercial aircraft reduce weight by incorporating plastic components into the design. Plastic has made a real revolution in our lives. And although most of the plastic that we encounter is thrown away after the first use, after reading this training material, you may think about saving something, for example, plastic knives and forks.
Using a polarizing filter, various plastic materials and a computer screen can detect the amazingly beautiful side of hard plastic.
Consumables that you need
Polarizing filter.
Computer screen.
Camera.
Transparent adhesive tape.
Sheet of glass.
Tripod (optional).
Transparent plastic items.
Customization
In short, you need to place a plastic object between the source of polarized light and the polarization filter. Polarizing filters are known to be screwed into the front of the lens and used by photographers to increase contrast and reduce glare.
Don’t you have a polarizing filter? You can use polarized sunglasses, as a last resort
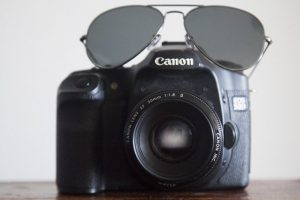
If you do not have a polarizing filter, a pair of polarized sunglasses will do the trick. Simply position them so that one “eye” is above the camera lens, and the polarizing glass plays the role of a filter. Keep in mind that the shape of the eyepiece will probably not completely close the front lens. In this case, you may need to crop the image during post-processing. You may also need to stick a sticky tape so that the glasses are permanently in the correct position.
Now you need to collect a few items from a transparent plastic material for photographing. For example, plastic bags, tape dispensers, plastic food containers, transparent plastic cutlery and packaging are suitable. In principle, any cheap, transparent plastic will somehow fulfill the function we need.
Find a good backlight
Then you need a light source to direct the light through the transparent plastic material found. Very convenient is the fact that modern screens of desktop computers and laptops emit linearly polarized light.
So, first, you need to maximize the white light from the screen. To do this, download a simple white background from Google Images, and after downloading, open the file in the default image viewer and open the image in full screen. So you provide the background for your polarized objects.
Arrange the items
Once the white background is set up, you can start arranging the plastic elements. If you have a choice between a desktop computer or laptop, we recommend using a laptop after all. Unlike the first, an open laptop, you can turn it “upside down” so that the screen is flat on the surface. This turns it into a homemade light box, which is ideal for placing plastic items.


